
Pairing & connection
Pairing is the process of binding a Teslasuit device to a specific PC and a specific Teslasuit account. It is the mandatory first step before any other interaction with a device, and it is performed only once — for a brand-new device, or for one that was previously unpaired. Pairing exists for security: it ensures the device is exclusively linked to one account, so no one but the owner can perform actions with it.
All the procedures below — pairing, unpairing, connecting, and disconnecting — behave identically for TESLASUIT and TESLAGLOVE; they are independent of the specific device.
Before pairing#
Complete a hardware setup and a software setup first.
Hardware setup:
- Power up the Teslasuit device.
- Turn on the PC.
- Prepare a free physical Wi-Fi adapter (integrated or external) — see Control Center - Wi-Fi Setup.
Software setup:
- Launch Control Center and authorize in the Teslasuit system (see Control Center - Launch & Authorization).
Once authorized, Control Center discovers all available Teslasuit devices in proximity range over Wi-Fi. In the main window:
- The MY DEVICES section lists all your previously paired devices, whether connected or not. With no paired devices yet, you will see a corresponding empty-state message.
- The Wi-Fi button (upper-right) lets you change the physical Wi-Fi adapter used for direct connection.
- The AVAILABLE DEVICES section shows discoverable devices — those not yet paired to your PC and account — within range of the selected adapter.
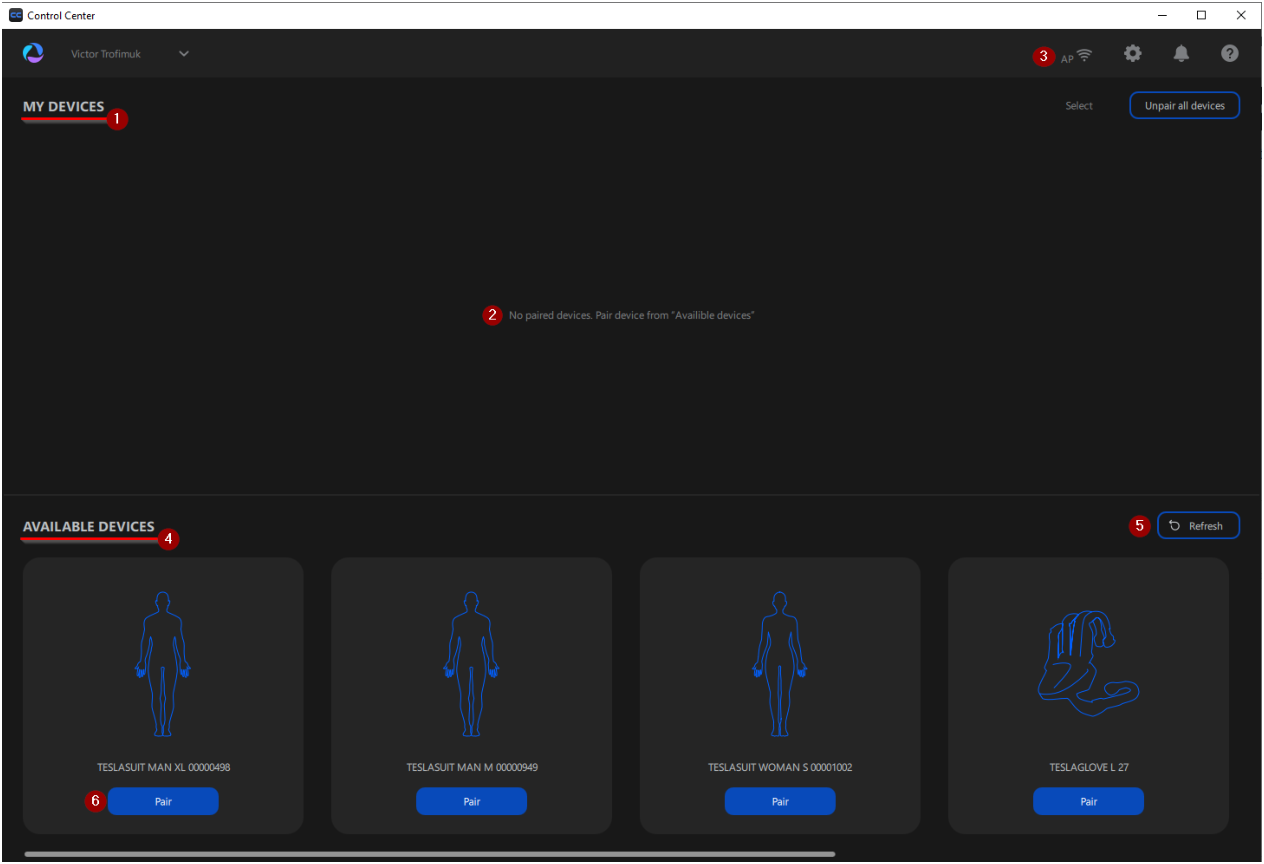
- MY DEVICES — your previously paired devices (empty here).
- Empty-state message — shown when no devices are paired yet.
- Wi-Fi adapter — the control to change the physical Wi-Fi adapter.
- AVAILABLE DEVICES — discoverable devices not yet paired.
- Refresh — re-run device discovery.
- Pair — start pairing the device from its card.
Warning
A device shown in AVAILABLE DEVICES may already be paired to another PC and account. If you try to pair such a device, you will get a notification, and it must be unpaired from its current configuration first.
Pairing a device#
- If the device you want is not listed, make sure it is powered up and click the Refresh button to rediscover the options.
- When the device appears, press the Pair button on its card to start the pairing procedure. The DEVICE PAIRING window opens for the direct connection.
- Enter the password to the device. For now, all devices use the same default password:
neuromancer. - Press Next to execute pairing.
- When pairing succeeds, you are prompted to name your device. This is optional — if you press Finish with a blank input, the default device name is applied.
- A new card for the now-connected device appears in MY DEVICES.
The DEVICE PAIRING window is where you enter the password — shown here for TESLASUIT and for TESLAGLOVE:
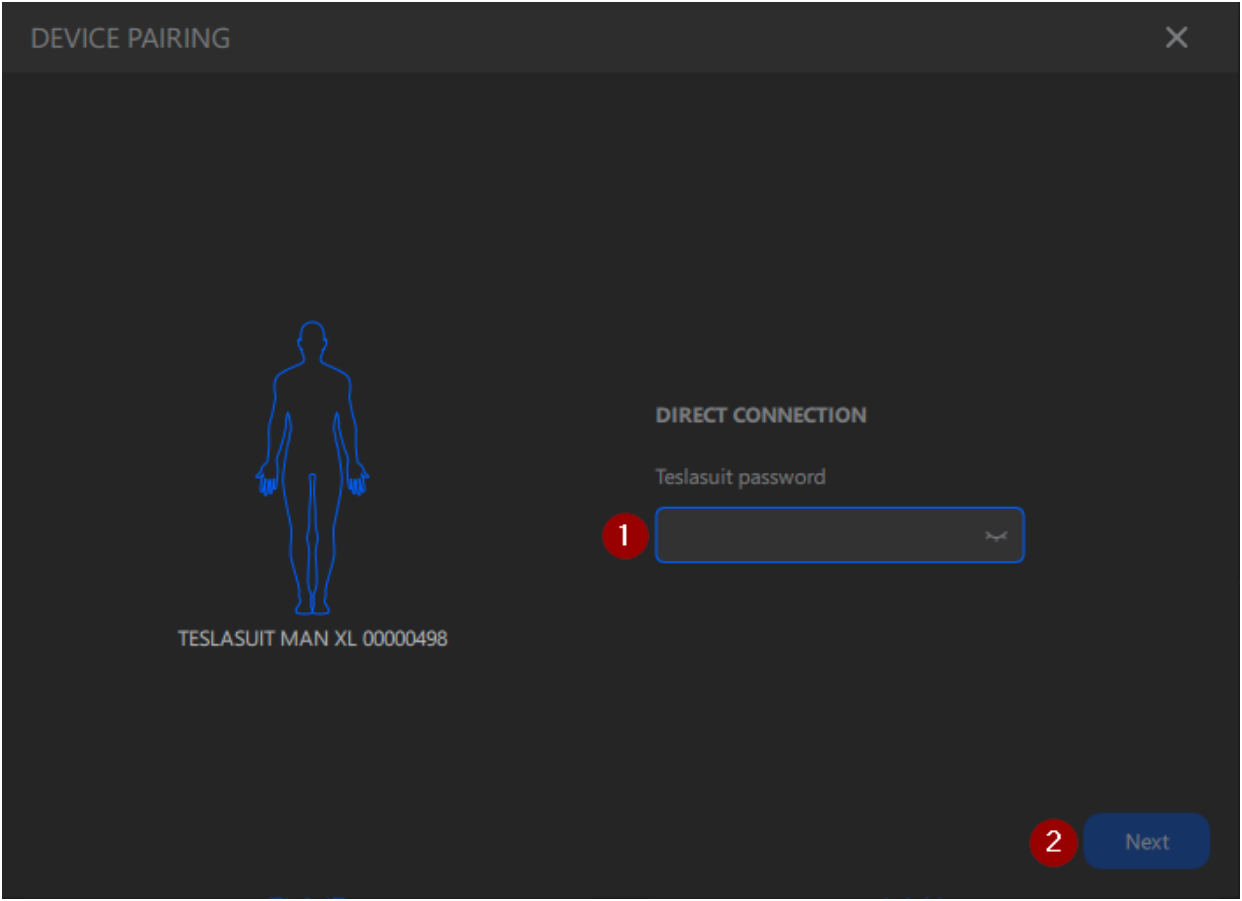
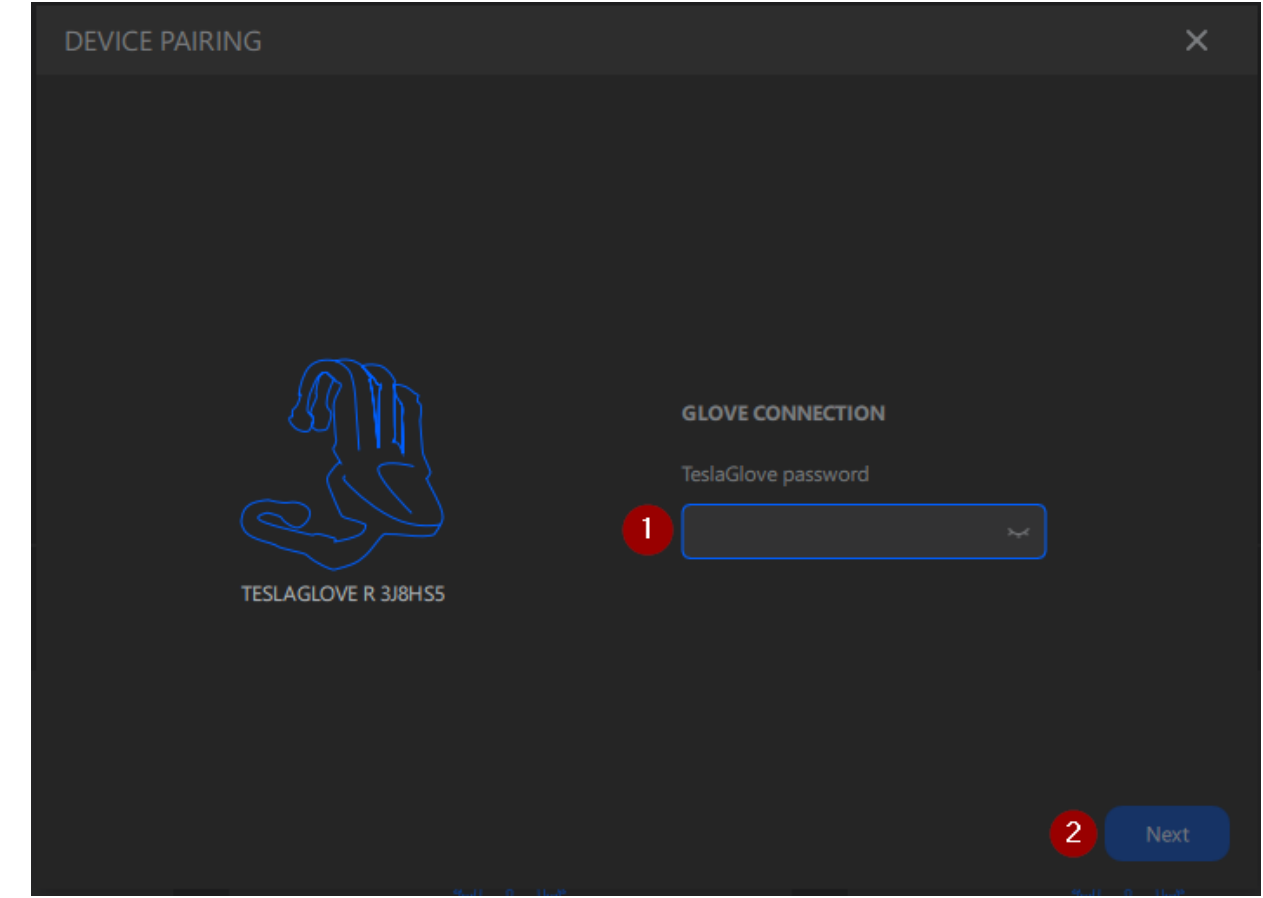
- Password field — enter the device password (the default is
neuromancer). - Next — execute the pairing.
Connect / disconnect#
Connecting or disconnecting applies to a device that has already been paired on the same PC under the same Teslasuit account. A device that is currently paired on a different PC, under another account, or that was previously paired in offline mode is not available for connection and must be unpaired first. The device must also be within proximity range of the PC's Wi-Fi adapter.
Both operations are performed with the buttons on the device's card in MY DEVICES:
- If the device is paired but not connected, press the connect button to connect it.
- If the device is paired and connected, press the disconnect button to disconnect it and finish the current session.
A device must be connected before you can calibrate, update, report on, or otherwise use it.
Unpairing#
You can unpair only connected devices. If a device is not yet connected, connect it first (one by one). Unpairing controls are in the upper-right of the MY DEVICES section.
To unpair specific devices:
- Enter selection mode by pressing the selection button.
- Check the checkboxes for the devices to unpair, or select all devices.
- Press the confirm button to complete unpairing, or the cancel button to abort.
To unpair all devices:
- Press the unpair-all button.
- In the modal dialog, press OK to complete unpairing, or Cancel to abort.
After pairing#
Once paired, a device is tied to that exact combination of hardware and authorization — only you, as the owner, can use it. To operate a paired device you must connect it through Control Center, after which you can continue with calibration and use.
Warning
A device is locked to the PC and account it was paired with until it is unpaired. If you want to share a device with another user — connect it to another PC or under another account — unpair it first. See Control Center - Known Limitations.